1. First of all open final cut pro and go to system settings and select it and it is now time to set things up.
3. Now set up your waveform Cache, Thumbnail Cache and Autosave Vault. You simply click set, select the file with your name or folder in and you do this for each one until it looks like this and then click ok.
4. Now you must set up a footage folder so you can keep what you have recorded safe and avoid your files going offline when editing.
5. You now go to file, scroll down to import and click folder so you are able to get all your recorded footage to edit.
6. Once your folders pop up click footage and then select choose.
6. Now you need you need to select capture scratch so when your work is saved once you have edited it, it goes straight there and you are able to have it saved and view whenever you want.


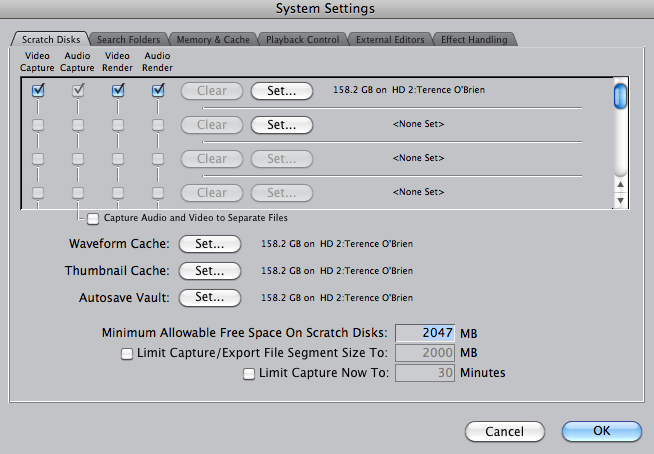 2. Now you set up your scratch disk by making a folder in HD2 and selecting it so it saves your work.


